Thursday, November 29, 2012

Lab 13, Lab 10 update 3 and Lab 12 update 1

Celebrating the end of the semester

I do not have any pictures to share, as I forgot my camera at my apartment! But during our last PLPA 631 Fungal Laboratory class on November 28, 2012, we presented our unknowns projects to the class via 10-minute PowerPoints. We then moved from the laboratory classroom on the third floor of the L.F. Peterson Building to a conference room on the first floor, where we enjoyed socializing, drinking the beer we made (see Lab 10 and updates in my blog), and eating the mushrooms (pearl oyster and Shiitake) we grew (see Lab 12 in my blog). The mushrooms were harvested from patches the night before the social and incorporated into dishes made by a few of our classmates (Lauren and Sheila), our "TA" (Cruz) and co-laboratory instructor Dr. Dan Ebbole. We enjoyed eating homemade bread topped with mushroom-infused oils (brought by co-laboratory instructor Dr. Brian Shaw) and a red pepper-mushroom relish, soup, quiche, fingerling potatoes, bread pudding and pasta. Everything was delicious, including the beer. Cheers!

Following are some pictures of me during the semester.
Me at Monterey Mushrooms in Madisonville, TX. Classmates Lauren (left) and Charity are behind me.
Me and co-laboratory instructor Dr. Dan Ebbole inoculating a corn seedling with Ustilago maydis.
Me tasting our clarified beer. Classmate Chris is behind me.
Me tasting the coral form of a pearl oyster mushroom. Classmate Sheila is behind me.

Monday, November 26, 2012

Unknown III

Unknown Project: Fungal Genus III

Purpose

The purpose of this project was to isolate and identify genera of fungi not listed in Group I of a picture key of common molds available at the following website: http://website.nbm-mnb.ca/mycologywebpages/Moulds/ID_Plate_I.html. 

Materials and Methods 

Potato Dextrose Agar medium
Sterile Petri dishes
Microscope slides
Cover slips
Squeeze bottle with sterile water 
Tweezers 
Scalpel 
70% ethanol 
Sterile water
15% bleach
50-ml beaker (for ethanol)
Bunsen burner 
Metal striker 
Paper towels or bench cover 
Parafilm 
Incubator set at 25 degrees Celsius 
Tabletop shaker
Compound microscope 
Canon PowerShot SD550 digital camera 

A. Fungal isolation and culture conditions 

Using a scalpel, a section of unhealthy tissue was excised from the leaf of an Indian Hawthorn plant (Figure 1) collected November 18, 2012, at Los Cucos Mexican Cafe in College Station, TX. The leaf section was surface sterilized in 15% bleach for 1 minute, triple rinsed with sterile water (2 minutes per rinse) and then dried on a paper towel. A tabletop shaker was used to surface sterilize the leaf section in a Petri dish (great swirling action and you do not have to hold the dish). Alcohol- and flame-sterilized tweezers was used to plate the surface-sterilized and dried leaf section onto full-strength Potato Dextrose Agar (PDA) medium (Figure 2). The plate was sealed with parafilm and incubated at 25 degrees Celsius in the dark for two days. Fungi that grew out of the leaf section were subcultured to new PDA plates on November 20, 2012, and the plates were sealed and incubated as described. Plates were removed from the incubator on November 25, 2012, and then placed on a laboratory bench to subject fungi to ambient temperature and light, and the circadian clock. Plates were observed macroscopically and microscopically (with a compound microscope) daily during both types of incubation. Closer examination of asexual fungal structures that developed (conidiophores and conidia) was done using a squash mount, as described in Lab 2 of my blog. A sterile technique, also described in Lab 2 of my blog, was used during all plating and microscopic observation, which was performed in Dr. Young-Ki Jo's laboratory in the L.F. Peterson Building at Texas A&M University in College Station, TX.

Figure 1
Figure 2
B. Identification of fungus to genus

One fungus isolated from the leaf section (Figure 2) was identified based on culture morphology and production of asexual structures (conidiophores and conidia), with the aid of published print (Figure 3) and online materials (http://www.studiesinmycology.org/content/72/1/1.full.pdf+html).

Figure 3
  Results

Figure 4. A fungal colony emerged from the leaf section within two days of initial plating on PDA.
Figure 5. Macroscopic view of the top of the fungal colony after growing seven days on a new PDA plate. The colony appeared circular, with a fuzzy greenish-gray center and grayish-white margin.
Figure 6. Macroscopic view of the bottom of the fungal colony after growing seven days on a new PDA plate. The center of the colony was a darker greenish-gray and had a faint ringlike configuration of growth.

Figure 7. Conidia viewed using a squash mount and a compound microscope at 40X magnification. The photograph was cropped and enlarged on a computer to show detail. Notice the different, distinctive sizes and shapes.
Discussion 
Based on colony and conidia morphology, the fungal colony isolated from the Indian Hawthorn plant at first appeared to be a species of Cladosporium. However, after consulting a paper at the website listed in Part B of the Material and Methods section above, the fungal colony could also be Cladosporium-like. I examined the figures shown in Bensch et al. 2012 (Studies in Mycology 72: 1-401), specifically Figure 1, Part 2 (Figure 8). Panel A shows the same conidia morphology that I observed in my fungal isolation. Thus, I am identifying my fungal isolation as Cladosporium-like and of the genus Ochrocladosporium.

Figure 8

Lab 10 update 2

Bottling our brew

Purpose 

During the laboratory exercise on November 21, 2012, we bottled the American amber ale we began brewing on October 31 (see Lab 10 blog) and clarified on November 14 (see Lab 10 update 1). 

Materials and Methods 

Bottles and tops 
Bottle capper 
Keg
Siphon
Sanitizer
Carbonation tablets
Carbon dioxide tank

All bottles, the keg and siphoning equipment were sanitized as before (see Lab 10 update 1 in my blog). A carbonation tablet was placed in each bottle before filling with the brew. A siphon was used as before to fill several bottles and then to place the rest of the brew in a keg. The bottles were capped. The brew in the keg also was subjected to carbonation using the carbon dioxide.

Results 

Co-laboratory instructor Dr. Dan Ebbole siphoned the beer from the carboy to the keg.
Carbonation tablets added to bottles before adding the beer. Carbonation will help form the foam (head) you see when pouring the beer into a glass.
Our beer in recycled, sterilized bottles. Capping was done in the lab. The beer will continue to mature in the bottles. Everyone in class got to take one bottle. I plan to drink mine over the Christmas and New Year break from school.
Dr. Ebbole and classmate Xin with keg of beer under pressure using carbon dioxide. Dr. Ebbole enjoyed another sample. Like the carbonation tablets in the bottled beer, the carbon dioxide under pressure will help form the head on the beer when it is dispensed.
Discussion 

I had already left TAMU for the Thanksgiving holiday, as I was traveling half way across the United States, so the pictures are courtesy of classmate Maxwell Handiseni. The brew will continue to mature in the bottles and the keg, the latter at least for another week, when the beer will be consumed during our last lab class.

Saturday, November 17, 2012

Lab 11

Monterey Mushrooms facility tour

Purpose

The purpose of this laboratory exercise on November 7, 2012, was to learn about commercial production of mushrooms by touring the Monterey Mushrooms facility in Madisonville, TX.

Materials and Methods 

Fluorescent security vest
Hair net
Long pants
Enclosed toe shoes
No jewelry
Long hair tied back
Nothing in pockets above the waist 

Results 

Highlights of the tour are pictured below.

 Aerial view of the Monterey Mushrooms facility in Madisonville, TX.
Monterey Mushrooms makes compost from straw and uses it as the preliminary food source in growing mushrooms.
Co-laboratory instructor Dr. Dan Ebbole (left), and classmates Lauren (center) and Charity, put on hair nets and safety vests required to walk through the facility.
Huge bales of straw used in making compost.
Armando, who works at the plant and conducted the tour, showed us step by step what happens to the straw in the biochemical process of making compost.
Heat is generated when making compost. You can see the steam rising. You can also feel the heat if you place your hand into the compost, as Armando did in the above photo.
Rows and rows of compost nearly ready to bring inside and fill wooden trays used to grow mushrooms.
Shan (left) and Zach check out the conveyor that brings in the compost from outside.
Wooden trays are filled with new compost. The compost is pasteurized to free it of weed molds and insects. And then the compost is cooled to room temperature before it is inoculated with mushroom spores. Trays are moved periodically to different environmentally controlled rooms to accommodate the different growth stages of the mushrooms. The time interval from production of compost to harvesting of mushrooms spans 72 days.
Mushroom primordia
Monterery Mushrooms grows both white (above) and brown (below) mushrooms. We got to sample both.
I have never eaten brown mushrooms, but I found the flavor earthy, almost smokey.
Laura enjoyed eating mushrooms too.
Mushrooms are hand picked and sorted by size.
Monterey Mushrooms packages and ships their products to grocery stores. Locally, you can find them at HEB.
Discussion

Since its establishment in 1971, Monterey Mushrooms, Inc. has gone from a family owned and operated farm in Royal Oaks, California, to an international, multifacility company, with 10 mushroom growing farms strategically located throughout North America. Headquartered in Watsonville, California, Monterey Mushrooms has production, sales and administrative offices internationally. Monterey Mushrooms is the country’s largest and only national marketer of fresh mushrooms to supermarkets, foodservice and ingredient manufacture operations, and preparers of processed canned, and frozen mushroom products. Detailed steps to how the company grows its mushrooms and other information can be found at the following link: http://www.montereymushrooms.com/

Lab 10 update 1

Clarifying our brew

Purpose

During the same laboratory exercise on November 14, 2012, during which we started growing pearl oyster and Shitake mushrooms from purchased kits (see Lab 12 blog), we clarified the American amber ale we began brewing on October 31 (see Lab 10 blog).

Materials and methods

Carboy
Siphon
Hydrometer 
100-ml graduated cylinder
Acid sanitizer
70% ethanol
Tap water
Disposable lab gloves
Autoclave tubs
Laboratory sink
Rolling cart 

Results

The yeast (Saccharomyces cerevisiae) that we added 14 days ago to the wort (our brew) is finished eating the sugar (dry and liquid malt extracts), expelling proteins (the layer of junk at the bottom of the carboy) and fermenting the mixture into alcohol. We now need to clarify our brew. Laboratory co-instructor Dr. Brian Shaw is pictured with the unclarified brew.
Dr. Shaw gave instructions on sanitizing the siphon and carboy used to transfer and clarify the brew. We do not want bacteria and other microbes to get in our brew when we are in the home stretch to enjoying the fruit of our labor.
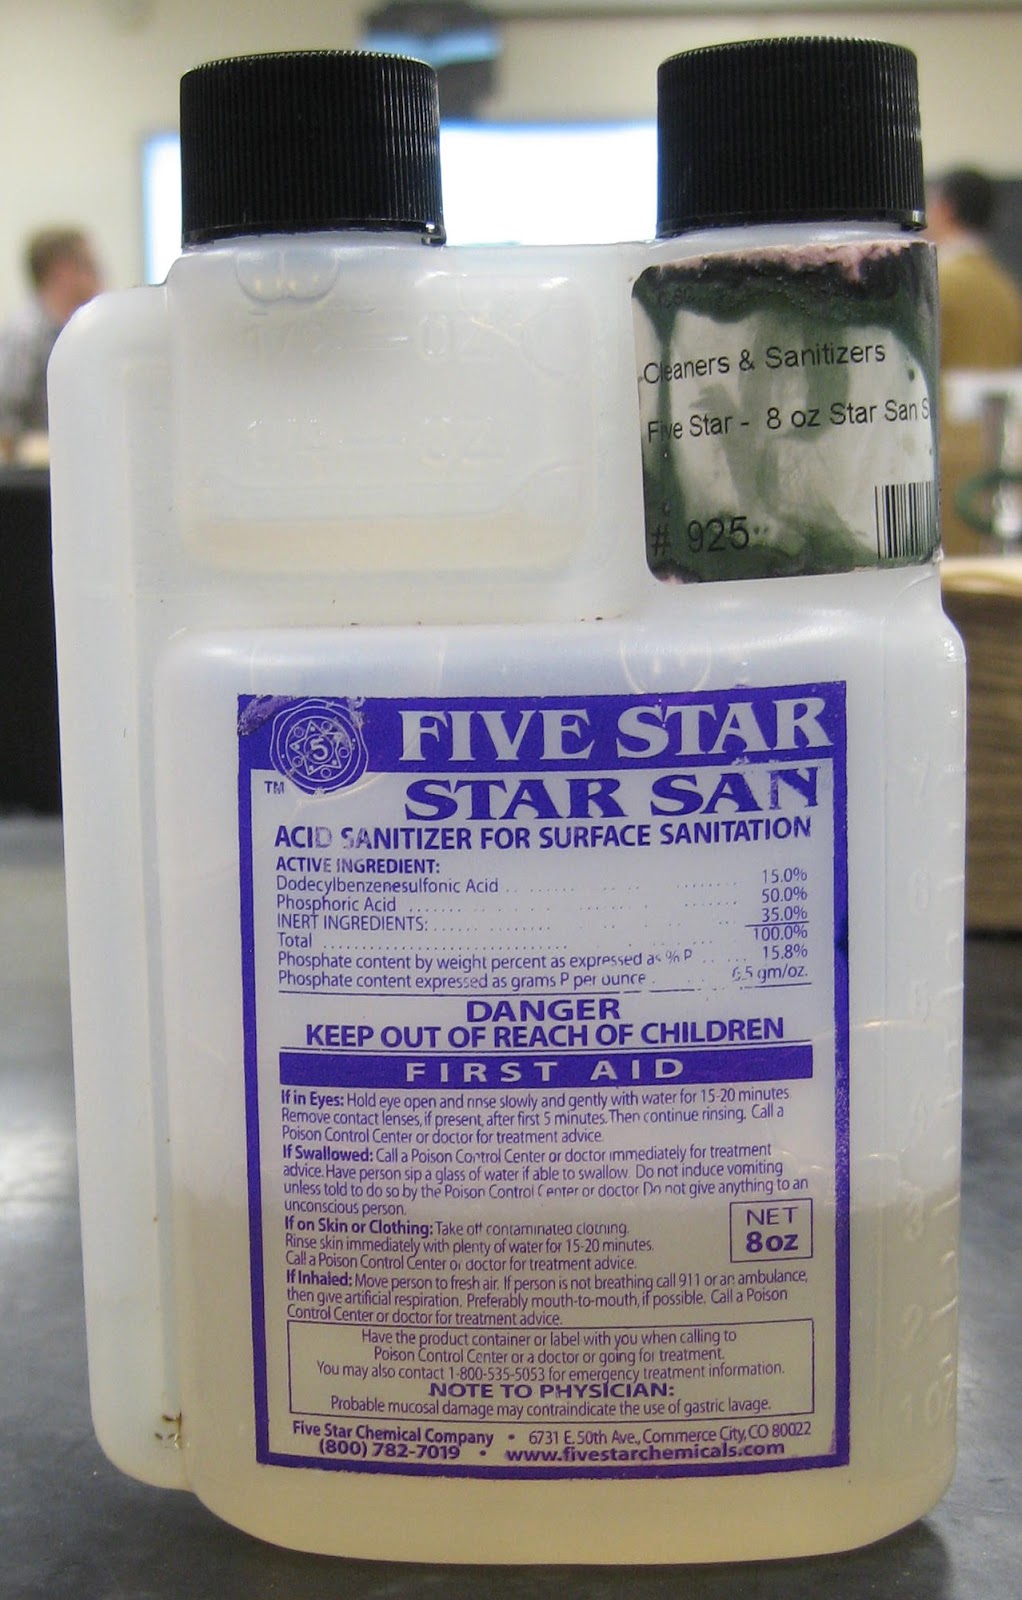
The acid sanitizer used to sterilize the siphon and carboy. You want to wear gloves to protect your skin.
Wenwei (pictured) sanitized the carboy. Xin had sanitized the siphon. Both used tap water to rinse the equipment. The sanitizer can generate a lot of bubbles, so 70% ethanol was used to break the surface tension and help rinse the carboy.
Many of us had eaten the octopus/coral form of pearl oyster mushroom found in the corners of our mushroom growing kit (see Lab 12 blog), so to avoid possible contamination (fungal spores in our mouths), Dr. Shaw (pictured) did the honors in getting the siphon started. He has done this many times before, so he is a pro at it anyway. Pictured looking on in the background are Chris (left) and Sheila).
Siphoning of the brew to a new carboy is nearly complete. We have it sitting in an autoclave tub so we do not mess up the floor. See how much better the brew looks without all the waste products from fermentation? Many of us wondered how it tasted. ...
But first Shan (left) and our other laboratory instructor, Dr. Dan Ebbole, tested the specific gravity (using a graduated cylinder and hydrometer), which can be used to calculate the percentage of alcohol by weight and volume (see calculations below). Notice the cup in Dr. Ebbole's hand. He can't wait to take a taste either. :-)
Pei-Cheng (pictured), Wenwei, Dr. Ebbole, Dr. Shaw and I were among those who tasted our clarified brew. It was good. Nice and smooth and not as bitter as the day we first made it. There is no grimace on Pei-Cheng's face. :-)
The original carboy after siphoning. Yuck!
O.G. = 1.052
F.G. = 1.014
Alcohol by weight (a.b.w.) = (O.G. - F.G.) x 105 = 3.99%
Alcohol by volume (a.b.v.) =  3.99 x 1.25 = 4.99% or 5%

Discussion

The beer will sit undisturbed in the new carboy for another week to mature in flavor and to continue to settle out. The beer will then be bottled during the laboratory exercise on November 21 (see Lab 10 update 2).

Friday, November 16, 2012

Lab 12

Mushroom production

Purpose

The purpose of this laboratory exercise on November 14, 2012, was to grow pearl oyster and Shiitake mushrooms using purchased kits. On the last day of class on November 28, we are going to eat the mushrooms while drinking the beer we made during a previous laboratory exercise.

Materials and Methods

Gourmet pearl oyster and Shiitake mushroom growing kits
Disposable foil pans
Bottled spring water
Plant stakes  
Spray bottle 

Results


Instructions that came in the pearl oyster mushroom growing kit.

Pearl oyster mushroom patch consisting of pasteurized straw colonized by mushroom mycelia. In the corner of the box you can see the octopus/coral form of the mushroom that formed and grew through holes in the plastic bag due to light starvation during shipping and storage of the patch. Mushrooms like a shady location but not total darkness to grow. And direct sunlight will dry out the patch and hinder mushroom growth.

Bottled spring water is being used to mist mushroom patches daily, but water from a well or rain also may be used. Chlorinated water discourages the growth of mushrooms, and distilled water lacks the nutrients mushrooms need to survive.

Danny misting outside of pearl oyster mushroom patch with purchased spring water. The disposable foil pan helps contain any water that runs off the patch after misting, which needs to be done daily. Mushrooms need humidity to grow properly.

Danny places a plastic tent that came in the kit over the misted pearl oyster mushroom patch to create a humid chamber. Plant stakes were used to "inflate" the tent like a teepee. Notice that the bag the patch came in is not removed prior to tenting. It has holes for mushrooms to form and grow through, as illustrated on the cover of the kit instructions.

Instructions that came in the Shiitake mushroom growing kit.

Shiitake mushroom patch consisting of a unique blend of sterilized, enriched sawdust and wood chips colonized with a select strain of Shiitake mushroom. The patch looks like popcorn. Growing of the mushrooms is "initiated" by first refrigerating the patch 3-5 days. That was done prior to the start of the laboratory exercise.

Danny covers the refrigerated Shiitake mushroom patch with purchased spring water, but well, rain or boiled tap water also may be used. The patch had to soak at least two hours. The patch was removed from the plastic bag, placed in a disposable foil pan and covered with a plastic tent that came in the kit. We did not use plant stakes to inflate the tent for this patch.

Octopus/coral form of the pearl oyster mushroom that had grown out of the bagged patch into the corners of the shipping box. The mushroom felt soft and somewhat rubbery. 

But as you can see, the octopus/coral form of the pearl oyster mushroom found in the box was edible and quite tasty. After all his hard work, Danny found time to sample this form of the mushroom.
Shiitake mushrooms emerged from patch after 4 days of daily misting.
Shiitake mushrooms after 6 days of daily misting.
Shiitake mushrooms after 11 days of daily misting.
Pearl oyster mushrooms emerged from patch after 6 days of daily misting.
Pearl oyster mushrooms after 11 days of daily misting.

Discussion 

We will continue to mist both patches daily and hope for a bountiful crop to eat while drinking our amber pale ale (see Lab 10 blog and updates) and watching our classmates' presentations of their unknown fungal projects during our last lab for the semester on November 28.